
In all my jobs- previous and current- I’ve been using Linux in one form or another, and I’ve grown to both enjoy and depend on it. For personal projects, I wanted to stick with that environment. My home machine runs macOS, however. To bridge the gap, I turned to UTM — a free, open-source virtualization and emulation tool for macOS. While UTM is a great option and alternative to Parallels, setting up a Linux VM with it does involve a bit of extra effort.
In this post, I’ll walk through how to set up an Ubuntu VM in UTM and configure it so you can SSH into it from your macOS host. If you only need terminal access, SSH is recommended over using the UTM GUI for a smoother and more efficient experience.
- Install UTM
- Download your desired Ubuntu instance (use ARM compatible ISO’s for M-series Macs).
- Follow all the steps found here: https://www.youtube.com/watch?v=1PL-0-5BNXs
- Go to the UTM network settings for your new VM
- Change the “Network Mode” to “Emulated VLAN”
- Go to port forwarding and select these options:
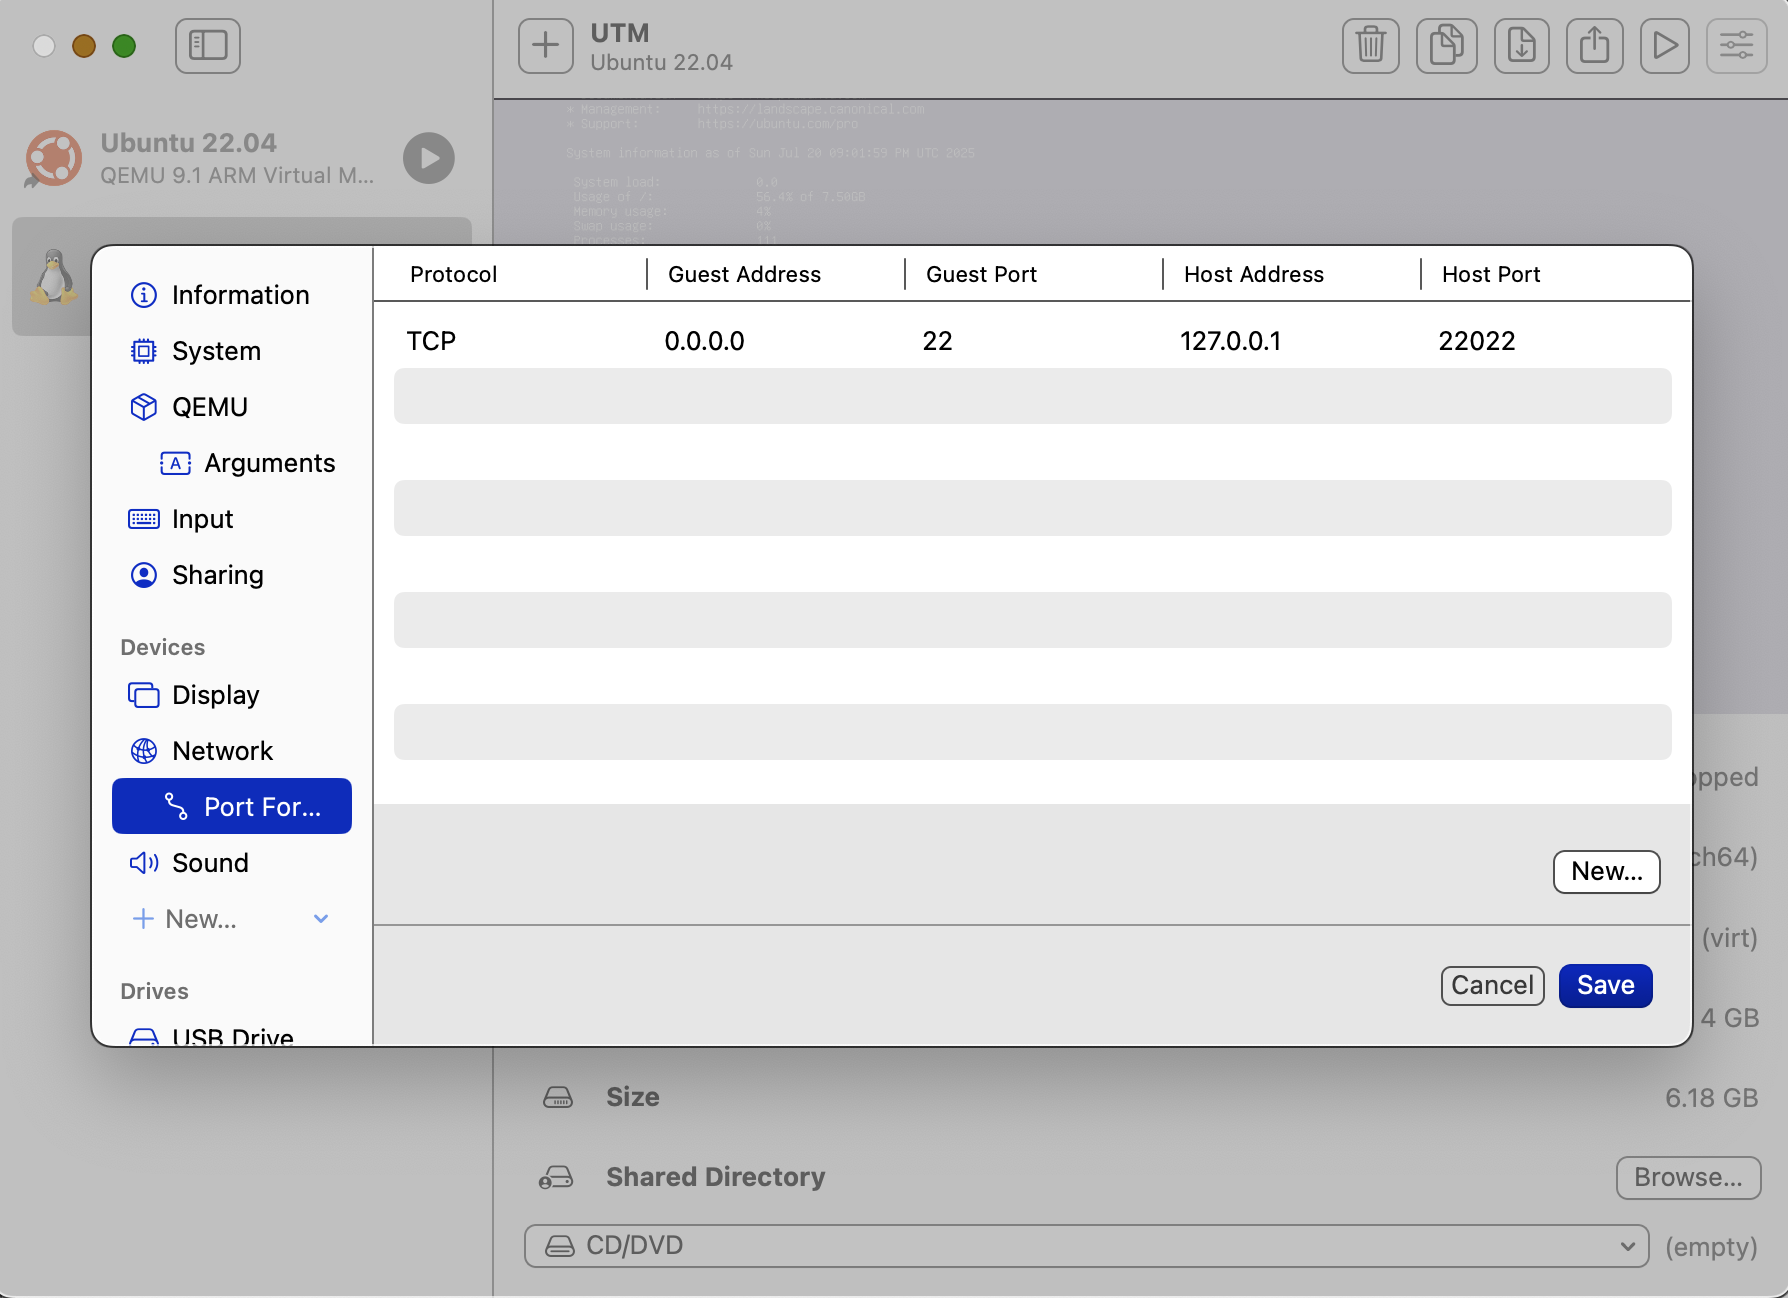 Figure 1
- Start your Ubuntu instance and log in
- Ensure you can allow for other machines to ssh into the Ubuntu guest machine by running
sudo apt install openssh-serversudo systemctl enable ssh
- In your host terminal, run
ssh -p 22022 <username>@localhost