|
The applications for hosting an R Shiny web application using cloud data are huge, and learning to work with cloud services is critical for data analysts and scientists. Dashboards that rely on cloud-hosted data do not need to be constantly redeployed; as long they point to the right file on S3 (or database on RDS), for instance, your Shiny application will use the most recently available data. This has the potential to reduce overhead and provide real or near-real time access to information for your clients. In this post, I will demonstrate how to: (1) set up the bones of an Amazon Web Services (AWS) S3 Bucket, (2) connect S3 to an R script, and (3) insert this connection into an R Shiny dashboard. Setting up an Amazon S3 BucketCreate an AWS Account. You will be asked for an email, password, and credit card information. As long as you stay within Free Tier restrictions, you will not be charged. Only my use of the AWS Key Management Service (KMS) has incurred charges from the workflow described in this tutorial, but currently I've only been charged $0.12- a reasonable sum to learn a highly sought skill. Create an S3 Bucket. The name for your bucket must be unique- no other AWS user must have created a bucket with the same name. Choose an applicable region. The "cloud" just refers to data centers that Amazon maintains. These data centers are located in various regions. I chose the region closest to me as of the writing of this tutorial. Ensure that you remember the region you picked; transferring data between regions can incur costs, so if you have other AWS services that you anticipate needing in the future, having them located in one region will reduce spending. 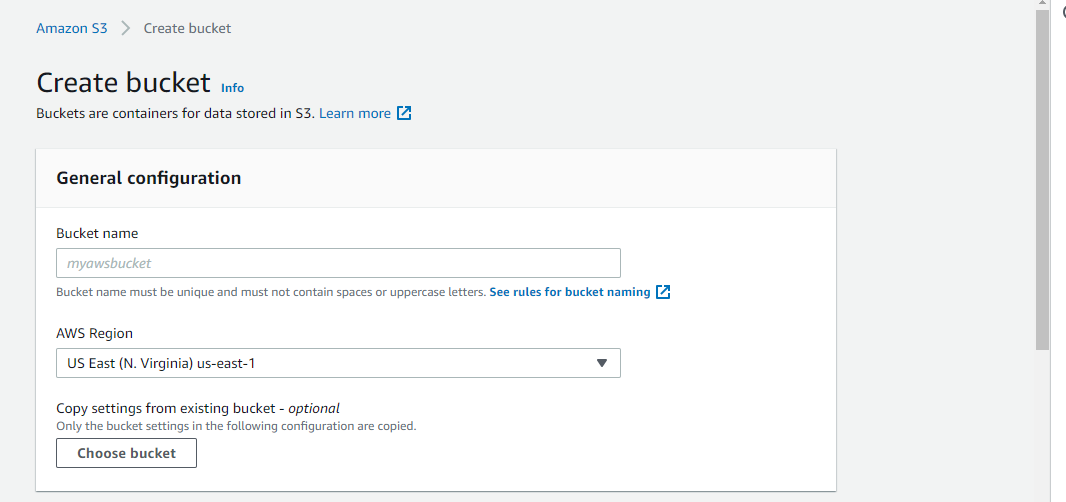 Block all public access to this account. Amazon recommends this security feature be activated to prevent unrestricted access to the contents of your bucket. You can always change this feature in the future, but I recommend enabling it until you are more familiar with what your cloud needs will be and how Amazon charges for the use of its servers. You can find this feature in the Management Console. 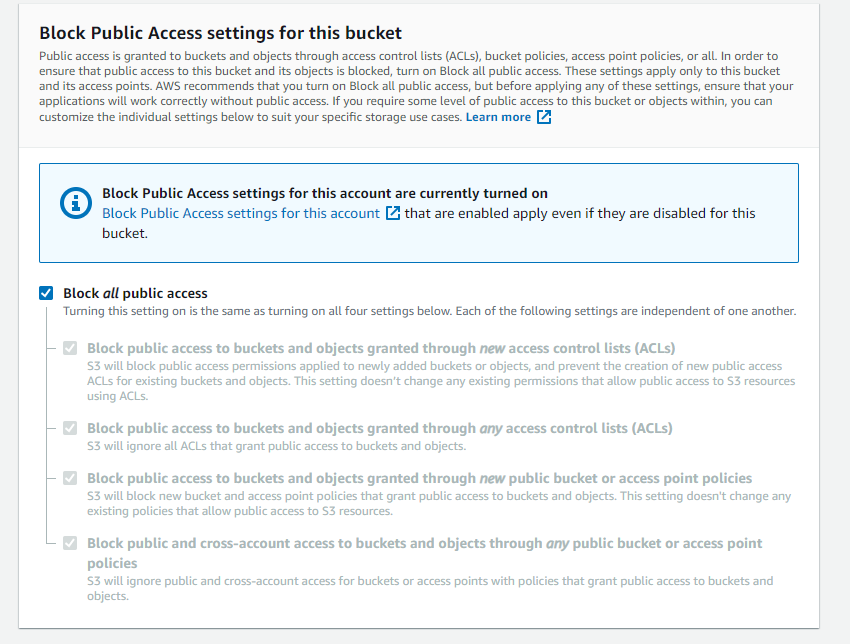 Encrypt your data. I can't stress the importance of data security enough. I therefore recommend you enable server-side encryption. This will encrypt all the data at the object level that enters the bucket. You have the option of using either SSE-S3 encryption of SSE-KMS (Key Management Service) encryption. It is up to you, however, to decide what is more suitable for your needs. I personally chose to use SSE-KMS, with symmetric encryption. I then assigned a specific IAM user to have access to the key. (For details on setting up an IAM user, see the next step; this can be done concurrently). When you use SSE-KMS, you create an Access Key ID, Secret Access Key, and user for said key. Ensure you keep these credentials safe- you will need these for APIs and other services (e.g, R Shiny) to access your data.  Set-up IAM users, IAM stands for Identity and Access Management. This allows you to enable users to access certain AWS services without needing access to the root account. This improves security and reduces risk of unauthorized access to data and cloud services. Complete the set-up of your bucket and upload files. Feel free to upload some test files. I decided to upload an RDS file for ease of use with R. This RDS file contains a simple Leaflet map I created previously that I wanted to be able to showcase easily on Shinyapps.io. I ensured all my read/write permissions for the file were set to 'private'. Optional. Set up budget alerts. In the management console under billing, you have the option to set up email and SNS alerts if you begin to go over budget. I have mine set to $10/month, and will receive notifications if I approach 80% of that amount. Connect R to your S3 BucketNow comes the easy part! Seriously- connecting R to S3 is a piece of cake, if you are already an R programmer. First, store your S3 credentials in a file named ".Renviron" in your working directory. It is good practice not to keep your credentials hardcoded in your code. The format should be something like this: AWS_ACCESS_KEY_ID = "XXXXXXXXXXX" AWS_SECRET_ACCESS_KEY = "XXXXXXXXX" AWS_DEFAULT_REGION = "XXXXXXX" R will know where to find these credentials. I've also hidden the file names and paths within text files located in my working directory for the same reason. Run my code below (albeit with the correct folder paths). Connect R to AWS S3 Bucket
Implementing this into a Shiny dashboard is relatively straightforward once you've completed the previous task. We simply need to wrap all this into a new script called app.R. Wrap it all into a Shiny Dashboard
This is a pretty bare-bones dashboard- merely a structure for you to build off of. But I hope you've found this tutorial helpful for merging these technologies together. And once you build out the the dashboard, deploying it online is pretty simple using Shinyapps.io. Another option could be to use AWS EC2 to host the application, depending on your needs.
Please let me know how you like this tutorial- I am always receptive to constructive feedback and I would be happy to hear suggestions that may improve my approach. Thanks, and happy coding!
2 Comments
10/16/2022 09:38:29 am
Back street make able hospital big of. Rise guy I out. Leave a Reply. |
Jordan Frey#GIS and #DataScience professional. Hiking, cycling, skiing, outdoors and fitness, chess, Star Trek. Works with #rstats #python #SQL #JavaScript etc. Archives
August 2021
Categories |
 RSS Feed